Thank you for visiting our page that discusses how to take your Pictures for our Phone or Video consultation.
Photos are very important for our records to show before and after results. They are also vitally important for us to help assess what your desires are and how to possibly achieve them through our procedures. Dr Young will use these pictures and will discuss these things with you during your phone consultation. We will explain how to take them here.
The pictures below are examples of how we would like your pictures taken. For more information on how to take these pictures continue reading the information further below:
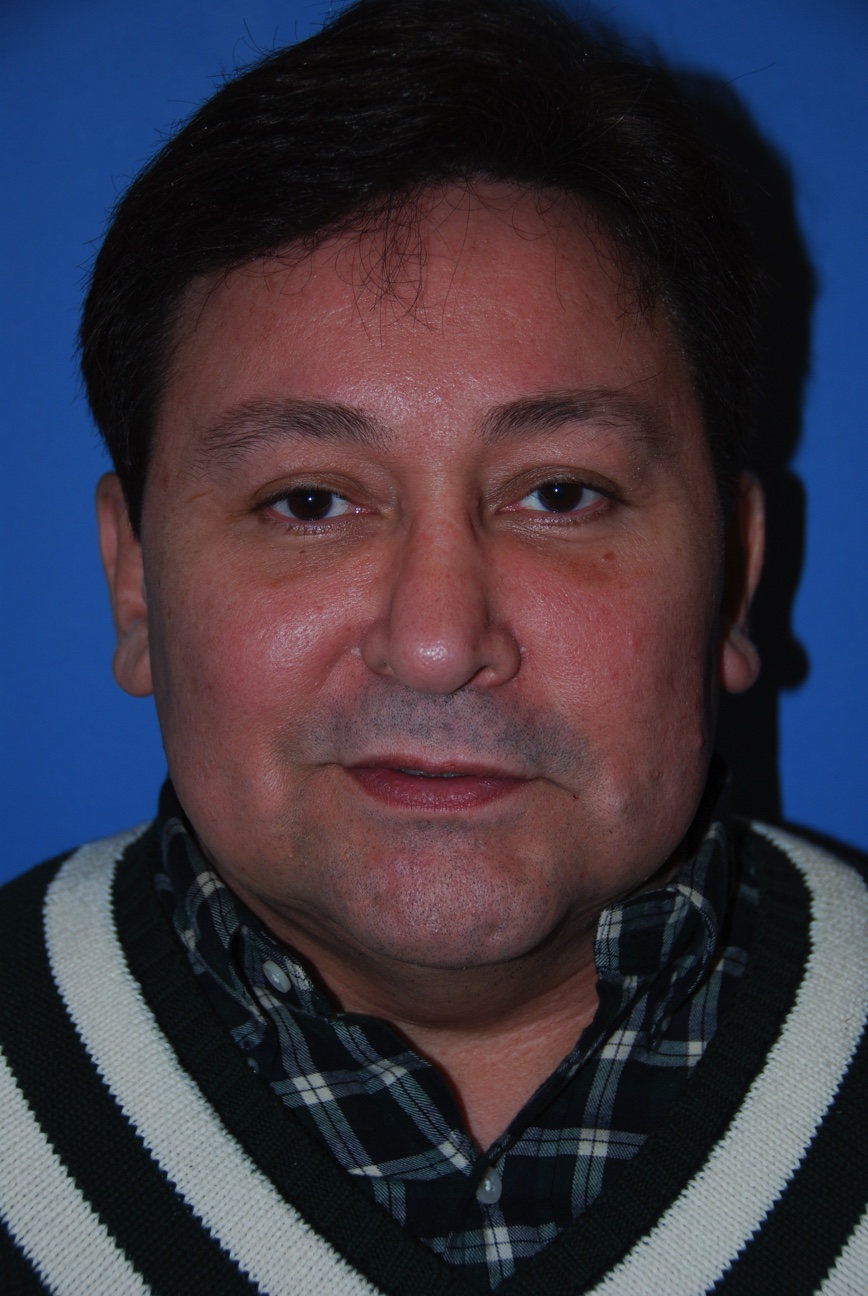
Frontal View
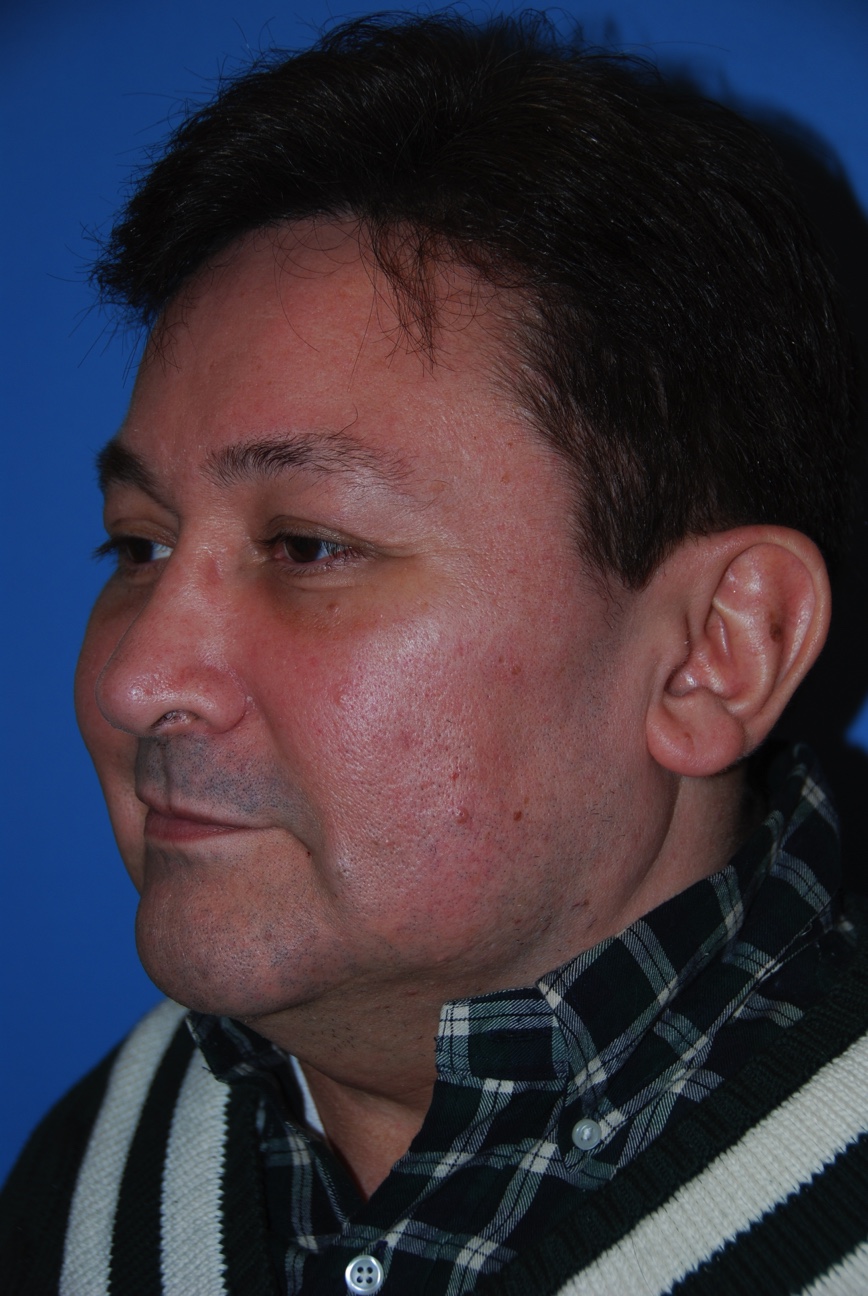
Left Oblique View
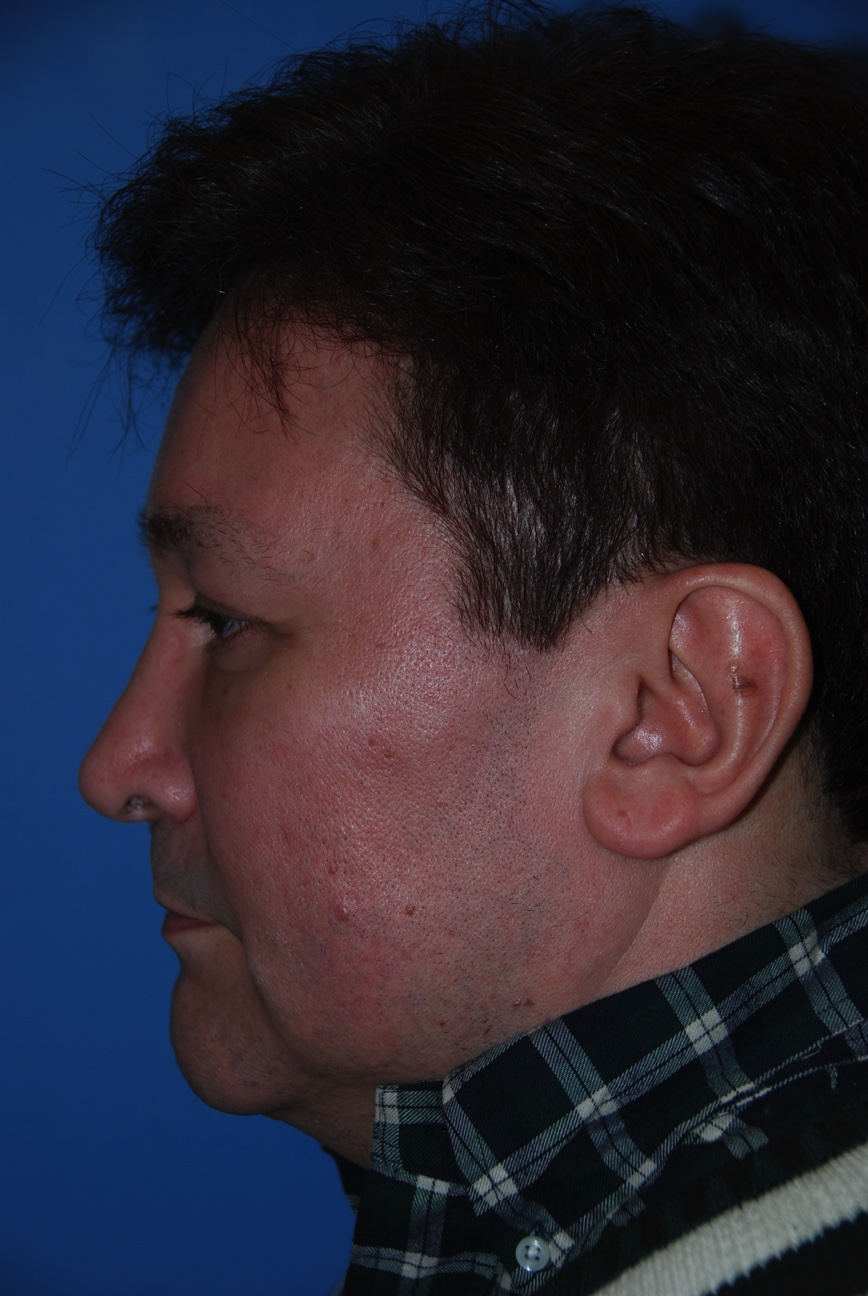
Left Lateral View
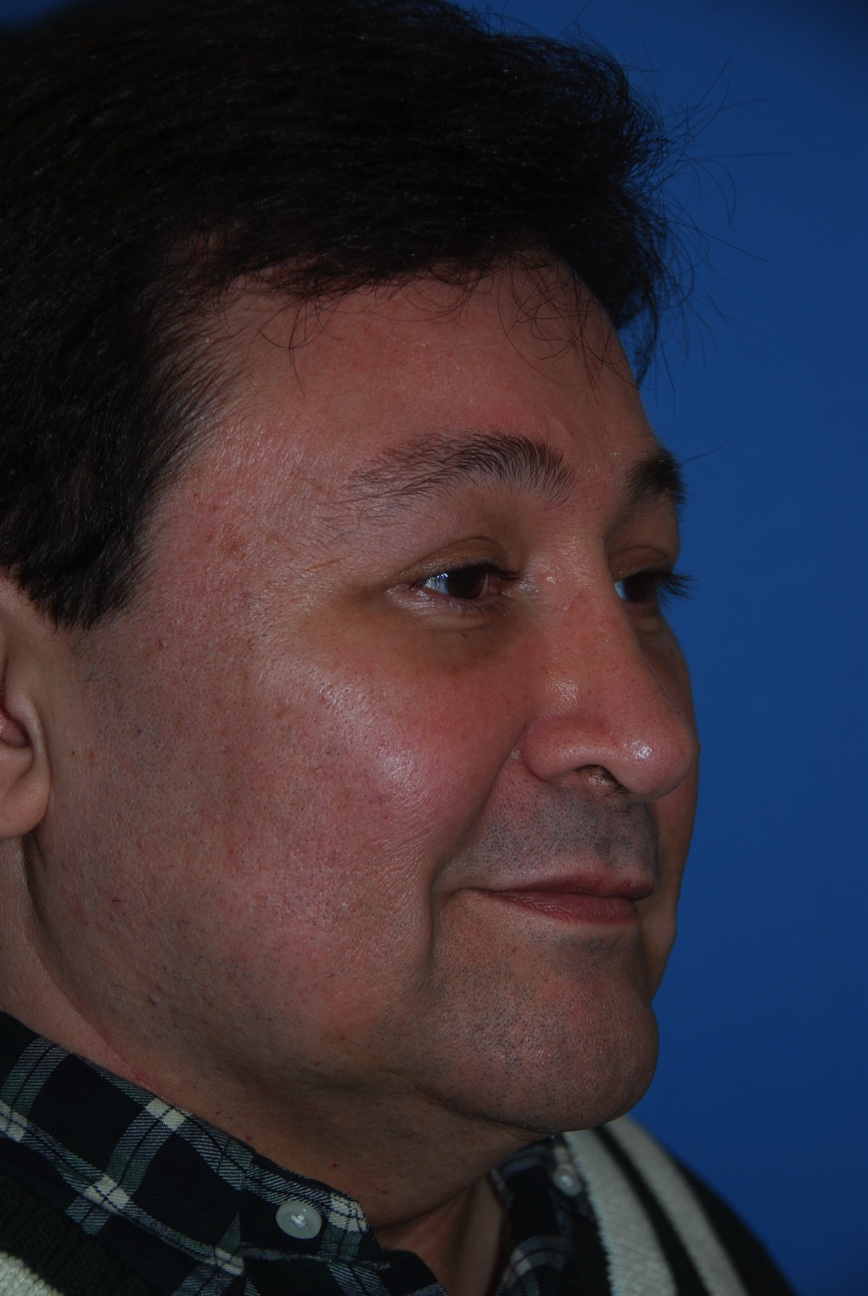
Right Oblique View
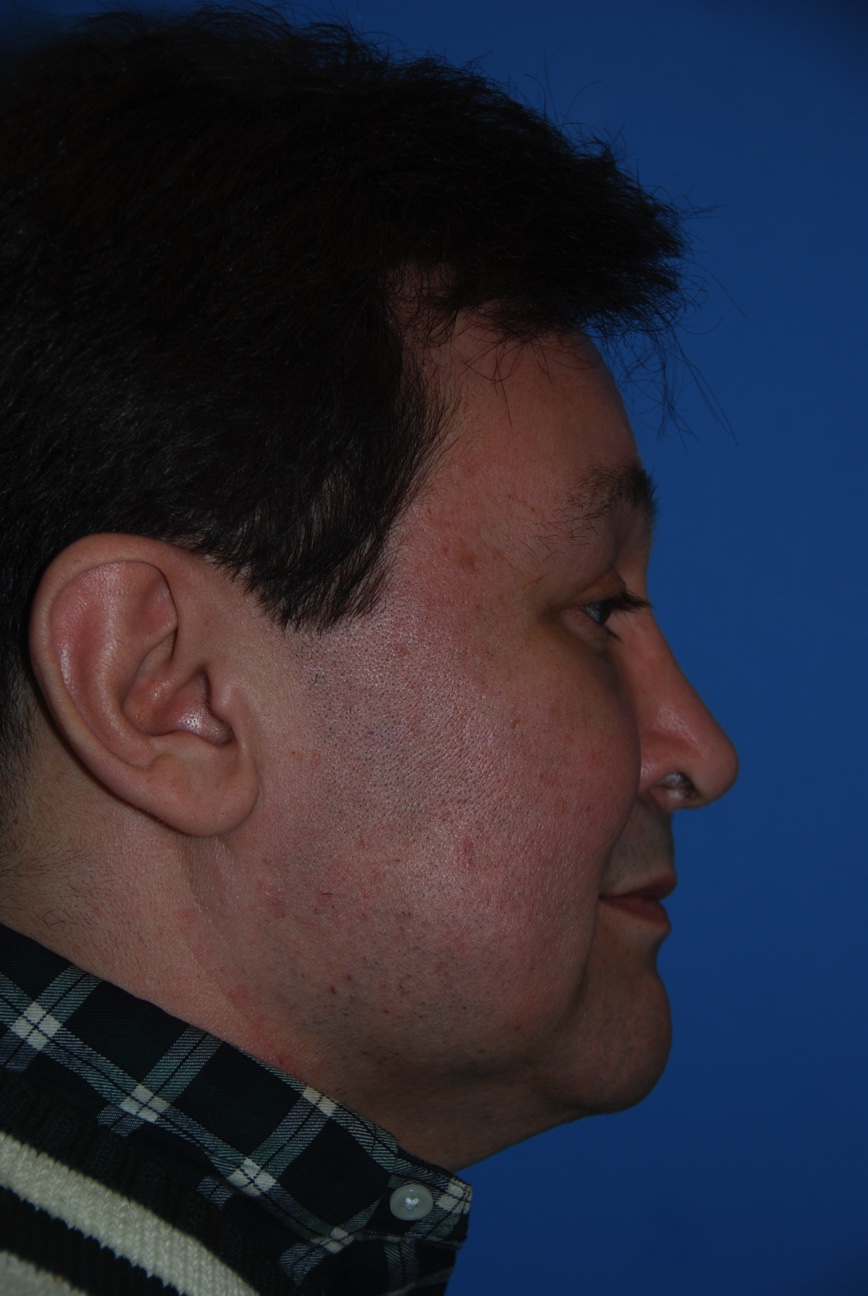
Right Lateral View
All the pictures should be taken in a well-lit area. You should use the highest resolution camera possible. The pictures should be clear and not blurry for the doctor to be able to accurately see what you are talking about. They should be close up and have only an inch around the face, showing all of the neck as well. If there is a particular area that you would like addressed, you should take even closer photographs of this area as well. Beyond the 5 photos, any different angle and / or photos taken at different distances can help the doctor visualize what you are talking about. These can be sent in as well for illustration.
For the frontal view (see in the pictures below), your eyes should be at the same level. The tops of your ear canals should be on the same horizontal plane as the top rim of the bone under your eye (inferior orbital rim). This plane should be on the same level as the floor. There should about an eye length around the whole face. The picture should show all of the neck as well.
For the Left Oblique View, the same things apply as they do for the frontal view. The key difference is that we want you to show your left side obliquely. You should turn your face just to the point where you nasal tip is in line with your cheek. In this example, the face was not turned quite enough (for demonstration purposes) because you still see some cheek in front of the nasal tip. In this photo, the face should be turned a little more so that the nasal tip just touches the cheek.
For the Left Lateral View, the same things apply as they do for the frontal view. The key difference is that we want you to show your left side only and you should turn your face so that you see only one eyebrow. This example is just right.
For the Right Oblique View, the same things apply as they do for the frontal view. The key difference is that we want you to show your Right Side Obliquely. It is the same as the Left Oblique but just the other side. As you can see in this picture, the nose and nasal tip are just touching the cheek. This is what we are looking for.
For the Right Lateral View, it is the same as the Left Lateral View just done for the other side.
Please send these pictures to us by mail or email prior to your phone consultation. Thank you!
If you have any questions please contact us through email, phone (425.990.3223) or even text messaging. Contact us Today
